Signs Your Air Ducts Need Cleaning: What to Look For
Spotting signs that you need air duct cleaning can be the difference between a healthy and comfortable home and unknowingly breathing in dust, allergens, and mold. If your vents are blowing more than just air, your HVAC system may not be working as it should. Here’s how to recognize the hidden warning signs before they turn into bigger problems.
Why Clean Air Ducts Are Essential for Home Comfort
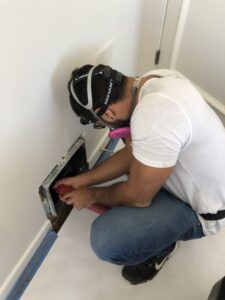
The condition of your air ducts impacts air quality, HVAC performance, and other aspects of your home’s comfort. When they become clogged with dust and debris and circulate these pollutants through your home and HVAC system, your indoor comfort suffers. Regular cleaning helps maintain a healthy ductwork system.
Improves Indoor Air Quality
Air ducts circulate air throughout a home, and particles from debris buildup inside air ducts can become airborne. As they spread across your living areas and worsen indoor air quality, household members may experience increased allergy symptoms and other discomfort. Common airborne contaminants include:
- Dust and dust mites
- Pet dander
- Pollen
- Mold spores
- Bacteria and viruses
- Volatile organic compounds (VOCs)
Clean air ducts help reduce these irritants, contributing to fresher and healthier air.
Enhances HVAC Efficiency and Performance
Dust and debris buildup in ducts restricts airflow, forcing your HVAC system to work harder to cool or heat your home. It can also spread throughout your system, coating important components and preventing them from operating as they should. A dirty evaporator coil, for example, limits the heat exchange process between the air and refrigerant, limiting AC performance and increasing the likelihood of frozen coils, leaks, and other problems.
Duct cleaning prevents obstructions from limiting airflow and disrupting the ductwork balance. With air moving as it should and with minimal contaminants, your HVAC system should experience enhanced efficiency, performance, and longevity.
Prevents Mold Growth and Odors
Air ducts are prone to humid environments that are ideal for mold growth. When moisture and organic matter accumulate, mold spores eventually germinate and grow. Mold spores contaminate the air and travel throughout your home, contributing to respiratory and cold-like symptoms and unpleasant musty odors from vents. Regular inspections and cleaning suppress and remove mold to maintain a fresh and spore-free indoor space.
Common Signs Your Air Ducts Need Cleaning
Recognizing these signs helps alert you to dirty ducts before they escalate into more severe problems.
Excessive Dust Buildup in Vents and Registers
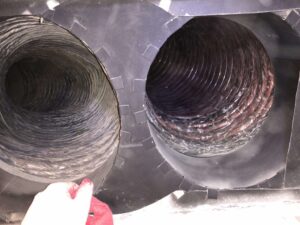
A noticeable layer of dust around supply and return vents suggests excessive dirt and debris circulating in your ductwork. When ducts become clogged, other surfaces in your home may also have greater dust buildup. If dust accumulates quickly despite regular cleaning, your ducts may be the problem.
Unexplained Allergy or Respiratory Issues
Airborne contaminants may cause allergy or respiratory symptoms to worsen indoors. If your symptoms improve when you’re away from home, you may be exposed to pollutants from your ductwork.
Mold or Mildew Smells
A persistent musty odor in your home may indicate mold in air ducts, especially if the smell is concentrated near the vents and intensifies during an AC or heating cycle. In some cases, mold may appear around the event openings, inside ducts, or on the evaporator coil.
Inconsistent Airflow
If your HVAC system struggles to cool or heat your home evenly, clogged air ducts may be restricting airflow. Hot or cold spots are most likely to occur near vents or in the areas furthest from vents.
Frequent HVAC Filter Clogs
HVAC filters typically require replacement every 30 to 90 days, depending on your home’s indoor conditions, but more frequent replacements than usual may suggest excessive debris traveling from the ductwork.
Increased Energy Bills
An inexplicable increase in energy bills may indicate HVAC efficiency problems stemming from ductwork problems.
What Happens If You Ignore Dirty Air Ducts?
Neglecting air duct maintenance may have long-term consequences for your household’s health and home comfort.
Poor Indoor Air Quality and Health Issues
People with asthma, allergies, or other respiratory conditions may be especially sensitive to contaminants circulated by dirty air ducts. Poor indoor air quality may exacerbate symptoms of preexisting conditions or cause other household members to experience sneezing, itchy eyes, difficulty breathing, and other respiratory discomfort. Long-term exposure to poor indoor air quality may have severe health consequences, particularly for children, seniors, and those with pre-existing conditions.
HVAC System Wear and Breakdowns
Dirty components, restricted airflow, and other inefficiencies associated with poor ductwork conditions accelerate wear on your HVAC system. As components strain and wear more quickly to match heating or cooling demands, your HVAC system is subject to an increasing risk of overheating, damage, and failure. Left unaddressed, excessive HVAC strain may result in costly repairs and even premature system replacement.
Fire Hazards
Although ducts may not cause a fire, accumulated dust, lint, and debris can be highly flammable. If ducts are near electrical wiring or heat sources, excessive dirt may increase fire risk.
Mold Growth and Structural Damage
If ducts develop extensive mold, it can spread throughout your home and damage walls, ceilings, and flooring. Mold may rot and weaken building structures, sometimes requiring remediation and structural repairs.
How Often Should You Get Your Air Ducts Cleaned?
Ducts require cleaning every three to five years, but the frequency of air duct cleaning depends on various household and environmental factors. These include:
- Homes with pets
- Household members with allergies or asthma
- Recent home renovations
- Humidity levels
- Excessive smoking or cooking indoors
- Regional air quality
If any of these conditions, your home and indoor air quality may benefit from more frequent duct cleaning services. An HVAC technician can also inspect and assess your ductwork during routine maintenance visits to determine whether your air ducts require cleaning.
Schedule Professional Air Duct Cleaning With TRIO Heating, Air & Plumbing
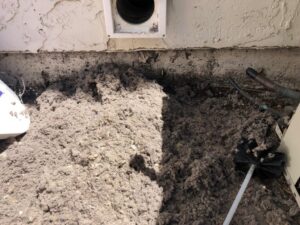
TRIO Heating, Air & Plumbing provides thorough air duct cleaning to remove dust, allergens, and contaminants, protecting your home and optimizing HVAC system performance. Contact us and schedule professional duct cleaning with TRIO Heating, Air & Plumbing to improve air quality and HVAC efficiency.
Top Trends in AC Installation for 2025: What Homeowners Should Know
The world of air conditioners is constantly changing as technology improves. Many San Francisco Area locals are used to witnessing the highest level of technological innovation. At TRIO Heating, Air & Plumbing , we stay on top of AC installation trends and new tech to help bring that innovation into your home.
We service all types of air conditioners and upgrade residential air conditioning systems throughout Southern California. With new technology, we help California homeowners enjoy better efficiency, sustainability, and comfort.

Why AC Installation Is Evolving in 2025
The year 2025 is a big year for air conditioner installations, and many beneficial changes are happening in home cooling solutions nationwide. One of the biggest changes is the mandated phaseout of refrigerants that contain ozone-depleting substances. This means that fixing and finding parts for air conditioners that use HCFC-22 or R-22 refrigerants will gradually become more difficult and expensive.
It’s a great time to move forward if you’ve been on the fence about upgrading to a new air conditioner. Modern systems are better for the environment, save you money on your energy bills, and have more convenient features than ever before; they keep you comfortable and integrate into your smart home technology.
Top Trends in AC Installation for 2025
The latest trends in AC installation for 2025 are:
- Smart home integration technology.
- Programmable thermostats are capable of learning your preferences.
- More efficient operation, which is better for the environment.
- Better temperature control options like variable speed motors and inverter technology.
- Improved filtration systems for better indoor air quality.
We’ll take a closer look at these trends below so you can make an informed decision when upgrading or installing a new air conditioning system.
Smart AC Systems and Connectivity
Smart AC systems connect to your WiFi. The latest HVAC technology has features like:
- Smart home system integration so you can use voice controls to change temperature settings, see when it’s time for a filter change, or access your thermostat remotely.
- Sensors to tell the system whether a room has people in it.
- Zoning capabilities, so you can set different areas in the home to different temperatures at the same time.
- Smart thermostats for AC that use real-time outdoor data to make micro-adjustments to your indoor climate to maintain your optimal temperature.
- High-tech filtration systems that provide excellent indoor air quality.
High-Efficiency and Eco-Friendly Cooling Solutions
Some of the most common eco-friendly air conditioning systems are run by geothermal, solar, hot water, or ice-power. These are quite costly to install initially but will save you money long-term, as you use less electricity to cool your home.
Not ready to overhaul your entire HVAC system? Installing a smart thermostat will reduce energy consumption. These easy-to-use devices are programmable. Set it to keep your house cool when you’re home, then use less power when you’re away or asleep. According to the US Department of Energy, these small actions may save you up to 10% on your energy bills.
The Rise of Variable-Speed and Inverter Technology
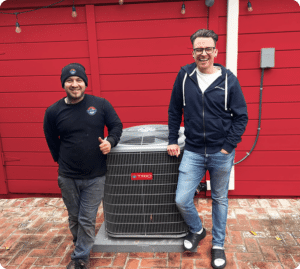
Variable-speed AC technology offers more than just “ON” or “OFF” like a single-stage system, or “LOW”, “HIGH”, and “OFF” like a two-stage system. They have sensors that detect the ambient temperature in the air and operate at anywhere from 25% to 100% capacity, maintaining your cool home comfort while using less power.
Inverter technology helps the system make adjustments by changing the motor speed without turning it on and off. The biggest inverter AC benefits are:
- Even, consistent cooling
- Precise temperature adjustments
- Reduced power consumption
- Quieter operation
SEER Ratings and Their Impact on Energy Costs
Seasonal Energy Efficiency Ratio, or SEER ratings, are best explained as a numerical value that tells you how efficient a heating and/or cooling system is. The US Department of Energy recently changed testing protocols for HVAC systems — the most recent ratings are now measured in “SEER 2”. Whichever rating you see on your air conditioner, the main takeaway to remember is that the higher the rating, the more efficient the machine is, and the more energy savings you’ll see.
Zoning Systems for Custom Comfort
HVAC zone control provides the ultimate comfort control, separating your home into individual climates. For example, if you like to keep the kitchen cool while you cook, but your spouse likes their office toasty warm, with zoning, it’s not an issue, as each zone can be set to a different temperature.
Choosing the Right AC System for Your Home
Choosing a new air conditioner is a big decision, which is why we provide free in-home consultations. We will speak to you about what you’re looking for, then inspect your current system and recommend the best energy-efficient AC systems for your needs.
How Homeowners Can Prepare for Future AC Innovations
If you’re a California homeowner, you can prepare for future AC innovations by:
- Considering whether you’re interested in smart-home technology and AI learning being incorporated into your HVAC system.
- Looking into rebates and tax incentives available to you, like the recent California energy rebates.
- Speaking to an HVAC expert, like the techs at TRIO, to learn more about the options available to you.
Call TRIO Today
We take pride in offering excellent air conditioning services with a focus on customer care and environmental responsibility. We service communities in the Greater San Francisco Bay Area, including Alameda, San Mateo, Santa Cruz, and Santa Clara counties. Call us today at (415) 234-4728, or contact us online for expert services you can trust.
How to Choose the Right Air Duct Filter for Your Home
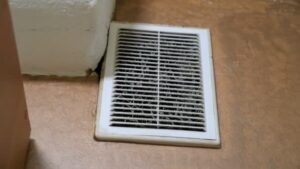
Your air duct filter is an important part of your HVAC system. It’s the barrier that traps airborne particles, stopping them from circulating into your home and improving indoor air quality. While the air quality in the San Francisco Bay Area is generally good, with a clean air filter, your system will filter out dust, allergens, mold spores, and more, keeping you and your family healthier.
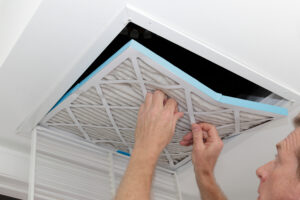
Air duct filter replacement is a simple solution to maintaining good indoor air quality in your home and keeping your heat and air conditioning system running with better efficiency. TRIO Heating, Air & Plumbing provides filter replacement, along with a wide range of heating and cooling system maintenance services to keep your system running smoothly year-round.
Read on to learn more about what air filters are, what they do, and how to find the right filter for your system.
Why Your Air Duct Filter Matters
Your air duct filter stands between you and harmful particulates, filtering dust, dander, pollutants, hair, and allergens from the air you breathe. This helps prevent health issues like allergy symptoms, dry or itchy eyes, headaches, throat irritation, and respiratory problems. The US Environmental Protection Agency (EPA) notes that if you have small children, pets, smokers, elderly folk, or people with allergies or breathing issues in your house, a clean filter is extremely important.
A good HVAC filter will keep your air clear and keep your system running efficiently. The more buildup inside the duct filter, the harder the system has to work. That’s why regular tune-ups are important — they’ll keep your heating and cooling working well and extend the life of the entire system.
Types of Air Duct Filters and Their Benefits
With so many filter types to choose from, how do you know which are the best air filters for your home? The answer depends on the type of HVAC system you have. These are the most commonly used residential air duct filters.
Fiberglass Flat Filters
Commonly found in forced air furnaces, these filters are used to capture large particles before they get into the crucial components of your HVAC system, but they aren’t effective at filtering out microscopic particulates.
Extended Media Filters
These 8-inch-thick stacked filters have pleated cotton or polyester folds to catch smaller air contaminants. They have to be professionally installed as they go inside a specialized filter holder in your ductwork.
Electrostatic Filters
Electrostatic filters create static electricity to make trapping particles easier. The electricity generated acts like a magnet and catches very small particles, including smoke and allergens. These filters don’t need replacement, but they do need to be cleaned every few months using soap and water.
Electronic Filters
These high-tech mechanical filters are plugged into an outlet so they can produce a high-voltage charge generated by a transformer. They’re highly effective at filtering out small particles. It’s important to check the safety rating on your electronic filter before purchasing to make sure they don’t generate ozone, a safety hazard.
High-Efficiency Particulate Air (HEPA) Filters
HEPA filters are pleated mechanical high-efficiency air filters that remove 99.97% of contaminants from the air, including pollen, mold spores, smoke particles, bacteria, and other tiny particles with a size of 0.3 microns.
Ultraviolet (UV) Filters
These are short-wave ultraviolet lights built into the HVAC system to kill microorganisms like bacteria and viruses. These types of filters should be used in conjunction with another type, as they don’t stop dust, hair, or any other particulates.
Gas-phase Filters
This type of filter is uncommon but sometimes used in homes as an add-on to an existing filtration system. They use gas sorption to attract gas molecules to a solid surface, removing odors and volatile organic compounds (VOCs) like ethanol, benzene, or methylene chloride. These filters have a short lifespan and must be replaced frequently.
Understanding MERV Ratings and What They Mean
Minimum Efficiency Reporting Values, or MERVs, are the metrics used to measure an air filter’s capability for capturing particles between 0.3 and 10 microns. By looking at MERV ratings for air filters, you can easily compare different filters and their abilities. If the filter has a higher MERV rating, it’ll be better at trapping particles than one with a lower rating.
Filters rated MERV 1-4 have a simple, basic design and will capture large dust and pollen particles. Those with a rating between 5 and 10 can catch mold spores and dust mites, while 11-12 means the filter will stop pet dander and smoke particles, making them better for homes with pets or those living with allergies or respiratory issues. Even higher MERV ratings will capture bacteria and the smallest particles nd are used in hospitals, clean rooms, and laboratories.
How To Choose the Right Filter for Your Home
Choosing the right HVAC filter is important to keeping your indoor air clean and fresh and your heating and cooling system running efficiently. You’ll have to consider your unique household needs and the types of filters that are compatible with your HVAC setup. If you’re not sure, call TRIO Heating, Air & Plumbing We’ll send an expert technician to look at your system and replace the filters for you.
How Often Should You Replace Your Air Duct Filter?
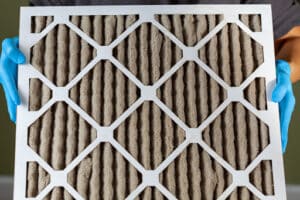
Each type of filter will have manufacturer recommendations for HVAC filter replacement timing, but generally speaking, you should clean or replace the filter when it looks visibly dirty, when you notice allergy symptoms or excess dust in your home, or after 90 days, whichever comes first. The Bay Area isn’t necessarily a dusty place, but the outdoor air quality varies, especially during wildfire season, so you may need to check your filters more often than the manufacturer's suggestion.
Call TRIO Heating, Air & Plumbing Today
Contact TRIO Heating, Air & Plumbing for all your HVAC questions, concerns, and service needs. We offer everything from a simple filter change to a full system overhaul. We serve the Greater San Francisco Bay Area, including San Jose, Santa Clara, Walnut Creek, Los Altos Hills, San Ramon, and Sunnyvale, CA. Book online or call us today.
How Heating Maintenance Can Improve Your System’s Lifespan
Your heater works hard to keep your home warm throughout the chilly Bay Area winters. However, wear and tear can cause its lifespan to fall short without regular upkeep. Routine tune-ups help catch minor issues before they become more significant problems, boost efficiency, and keep everything working correctly so you can enjoy cozy comfort for years to come. Read on to discover how regular heating system maintenance improves your unit’s lifespan and keeps your home warm and worry-free all winter long.
Why Heating Maintenance Matters
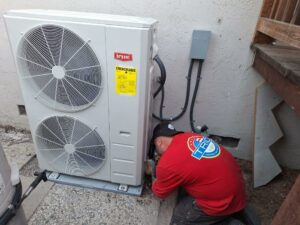
Like any home system, your heater needs regular upkeep to keep everything running smoothly. When you schedule professional heating maintenance, a certified technician inspects, cleans, and tunes up your unit from top to bottom. They check that all parts are working correctly, look for potential hazards, and identify minor issues before they progress. These tasks improve your unit’s efficiency, prevent heating repairs, increase its lifespan, and keep your home safe and warm through the chilly winter months.
Key Benefits of Regular Heating Maintenance
Keeping up with regular heating maintenance offers several benefits that improve home comfort, lower bills, and keep your household safe. By taking care of your system, you’ll avoid unexpected breakdowns, improve energy efficiency, and extend its lifespan. Some of the top perks you’ll see include:
- Lower energy bills: A well-maintained heater uses less energy to warm your home, reducing your utility bills and carbon footprint.
- Fewer repairs: During your heating tune-up, the technician will look for and fix any minor issues before they become bigger, more costly problems.
- A safer household: Regular maintenance helps minimize the risk of dangerous carbon monoxide leaks or electrical issues.
- A longer system lifespan: Routine maintenance prevents excessive wear and tear, helping your heater run for years to come.
- Consistent home comfort: With your heater running smoothly, you won’t have to worry about uneven temperatures, poor airflow, or breakdowns keeping you in the cold.
Signs Your Heating System Needs Maintenance
It’s important to schedule a heating system checkup at least once a year to keep your unit running in top condition. If it’s been over a year since your last heating service or you can’t seem to remember when your last service was, it’s a good idea to schedule maintenance. Some other key signs that your heater is overdue for a tune-up include:
- Rising energy bills: A poorly maintained heater uses more energy to warm your home, causing your heating bills to increase.
- A yellow pilot light: Your furnace pilot light should always be bright blue. If it looks yellow, there may be a carbon monoxide leak that requires immediate service.
- Excess dust near the vents: Unchanged or dirty filters cause dust to build up around the vents, decreasing indoor air quality and blocking airflow.
- Strange noises: Grinding, rattling, or banging noises can indicate internal issues that need attention.
- Inefficient heating: If your house takes forever to warm up, your heater may struggle to function due to wear and tear.
- Strange odors: Burning or other foul odors from your heater often indicate dust buildup or mechanical issues requiring service.
How Maintenance Helps Extend Your System’s Lifespan
While most heating systems last 10 to 15 years, regular maintenance can help your unit reach and even exceed this lifespan. Regular upkeep, such as lubricating moving parts, tightening connections, and performing other key tasks, keeps your heater in top condition while reducing wear and tear. By limiting the strain on your system, you’ll boost its lifespan and prevent the need for costly repairs or early replacement.
DIY vs. Professional Heating Maintenance
When it comes time for your annual heating tune-up, you may be tempted to do the job yourself. While you can perform a few DIY tasks to keep things running smoothly until your next service, heating maintenance should always be left to the professionals.
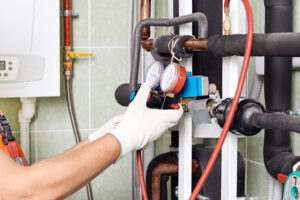
Certified HVAC technicians have the skills and experience to perform a comprehensive maintenance checklist, ensuring that all components receive a thorough inspection, cleaning, and tune-up. They can also spot worn-out or failing components that an untrained eye might overlook, helping to prevent more significant, costly issues.
With a professional service, you can rest easy knowing that your heater is in optimal condition, free from safety hazards, and running efficiently for years.
How Often Should You Schedule Heating Maintenance?
It’s important to schedule maintenance at least once a year to prevent breakdowns and keep your heater running efficiently. The best time to book your tune-up is in late summer or early fall before peak heating season begins. This timing helps prepare your heater for the cold winter temperatures ahead.
With a full inspection of your unit during this time, you won’t have to worry about unexpected breakdowns or major issues impacting your home comfort. The technician will catch and repair any minor problems, preventing them from progressing into major repairs. With annual maintenance, you’ll improve your unit’s efficiency and extend your HVAC’s lifespan, keeping your home warm and cozy for many winters ahead.
Call TRIO to Schedule Professional Heating Maintenance Today!
Keep your home warm and cozy for years with professional heating maintenance from the team at TRIO. Our experts offer five-star furnace tune-ups throughout the Greater San Francisco Bay Area that extend your HVAC’s lifespan, improve energy efficiency, and prevent costly repairs. Don’t wait for a breakdown to schedule service. Call our team to book your annual tune-up today!
Want to take your heating maintenance to the next level? Join our maintenance Membership Program to receive bi-annual 29-point HVAC tune-ups, priority service, and other VIP benefits.
Seal the Deal: How Duct Sealing Can Improve Your Home’s Efficiency
The ductwork in your home’s HVAC system is a circulatory system, delivering warm or cool air to every room. When leaks develop in your air ducts, your comfort and wallet can take a serious hit. Many HVAC systems in the United States fail to meet their rated efficiency due to poor installation and leaky ducts. At TRIO Heating, Air & Plumbing , we’ve seen firsthand how professional duct sealing services can vastly improve the efficiency of HVAC systems.
Why Duct Sealing Is Important
Think of your air duct system as a network of pathways. These ducts travel behind walls, through attics, and crawl spaces. When they develop leaks, they lose the heated or cooled air destined for another room in your home.
They’re also pulling in whatever happens to be in those hard-to-reach places. This could include insulation fibers, dust, moisture, mold, and even asbestos particles in older homes. Beyond the obvious waste of energy, air duct leaks can significantly harm indoor air quality and put your family’s health at risk. Above all else, this underscores why duct sealing is important.
The unique San Francisco Bay Area climate presents specific challenges for our HVAC systems. The frequent fog and the marine layer bring in moisture that can accelerate duct deterioration, while our mild winters and warm summers mean your HVAC system likely needs to work all year round. Many Bay Area homes, especially in older neighborhoods, have ducts running through unconditioned spaces like attics, making them more susceptible to leaks and efficiency losses.
Key Duct Sealing Benefits
When you invest in proper duct sealing, you invest in many notable benefits for your home and family.
Enhanced efficiency
When air ducts are properly sealed, conditioned air reaches its intended destination instead of leaking into unused spaces. Duct sealing improves energy efficiency by sealing leaky ducts, which can improve HVAC system performance and efficiency by up to 20%. This direct air delivery means your system maintains comfortable temperatures without working overtime.
Lower utility bills
You can significantly reduce energy bills with duct sealing. Most homeowners see a noticeable difference in their monthly utility bills right away. Given that the Bay Area’s energy costs are among the highest in the country, this benefit is especially significant for local homeowners.
Improved air quality
Sealed ducts prevent contaminants like fog-carried moisture, outdoor allergens, and attic dust from entering your living space. Good indoor air quality is vital for the health of your family members. Properly sealed ducts are especially important during wildfire season to prevent outdoor smoke from infiltrating leaky air ducts.
Consistent home comfort
Along with other duct sealing benefits, this professional service can eliminate frustrating temperature variations between the different rooms in your home. This is especially noticeable in multi-story homes in the Bay Area. Duct sealing can help maintain even temperatures across different floors, keeping your home consistently comfortable from room to room.
Extended equipment life
Another reason why duct sealing is important is when your HVAC system doesn’t have to fight against air duct leaks, it experiences less strain and operates more efficiently. This reduced workload helps prolong the service life of your HVAC system, postponing the need for costly repairs and replacements and reducing maintenance requirements.
Signs Your Ducts May Need Sealing
Look out for these telltale signs that your air ducts need professional attention:
- Excessive condensation around vents during foggy days
- Musty odors when running the system, especially in the morning
- Higher humidity levels indoors than expected
- Unusually high energy bills, especially during peak heating or cooling periods
- Rooms that are constantly too hot or too cold
- Stuffy or uncomfortable air quality
- Visible dust around your air vents
- The HVAC system is running constantly but failing to maintain temperature
- Black marks on the insulation around your ductwork
- Respiratory issues or irritation among household members when the system is running
Questions to Ask Your HVAC Professional
When considering professional duct sealing services, working with qualified technicians is important. Here are a few key questions to discuss:
- What methods and materials will be used for duct sealing?
- How will you identify possible leak points?
- Will you be testing to verify the effectiveness of the air duct sealing?
- How long will the new seals last before they need to be repaired or replaced?
- Do you have any maintenance recommendations to prolong the life of the sealing?
- Can you provide before and after efficiency measurements?
- Are there any specific challenges Bay Area homeowners should be aware of?Do you offer a guarantee or warranty on your work?
- Do you offer financing options and maintenance plans?
DIY vs. Professional Duct Sealing
Some homeowners may consider a DIY approach, but professional duct sealing services offer several advantages. A common misconception is that regular duct tape is sufficient for sealing, but it deteriorates quickly. Some people may believe that small leaks don’t matter, but they can reduce efficiency by as much as 30%. Even new home construction can have duct leakage.
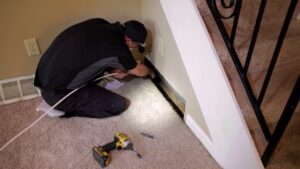
At TRIO Heating, Air & Plumbing , our professional approach starts with a comprehensive inspection. Our technicians evaluate your HVAC system using specialized equipment to detect leaks and assess airflow. Next, we clean the air ducts to improve HVAC system performance and remove any debris that could compromise airflow or undermine the duct sealing process.
The professional duct sealing process may include high-quality HVAC sealant tape, high-temperature-resistant silicone sealant, and mechanical fasteners for long-term stability. After sealing, we’ll conduct pressure testing to verify the work's effectiveness and ensure all leaks have been addressed.

Book Professional Duct Sealing Services Today
Don’t let leaky ducts blow your energy bills out of hand. Contact TRIO Heating, Air & Plumbing to schedule your professional duct sealing service and start saving on energy bills. Our experienced technicians will thoroughly inspect your air ducts, identify all leak points, and seal them properly for top performance and air quality. Duct sealing is about more than energy savings — it’s about creating a healthier, more comfortable home year-round.
When to Call a Professional for Heating Repair: A Homeowner's Guide
A functioning heating system is your secret weapon to keeping the Greater San Francisco Bay Area winters cozy while at home. But just like any hard-working appliance, your HVAC isn’t immune to wear and tear. Ignoring the warning signs only leads to bigger problems, potentially costly repairs, and even safety hazards.
While minor issues could be handled on your own, you may not know what to look out for, and DIY fixes could lead to major problems down the road. We’ll help you identify the key red flags that signal it's time to bring in TRIO’s heating experts, ensuring your home stays warm and safe all season long.
The Importance of Annual Heating Maintenance
Annual heating maintenance of your system helps keep the heat flowing throughout the cooler months. Regular service can identify and resolve unexpected issues, improve energy efficiency, and even extend the lifespan of your heating system.
A trained professional can spot even minor issues before they become major repairs, helping your furnace, boiler, or heat pump operate to its full standard and reducing future repair and replacement costs.

What are the Consequences of Skipping Heating Maintenance?
Skipping your system’s annual heating maintenance can lead to more headaches shortly. Higher energy bills, unexpected breakdowns, and a shorter system lifespan are just a few of the issues you could face.
The importance of heating maintenance is easy to see. In terms of safety and health, neglected filters can worsen your indoor air quality, and undetected gas leaks or carbon monoxide buildup could pose more serious safety risks.
Don’t wait until the temperature drops and you’re left in the cold. Regular maintenance helps your system run more efficiently for longer, keeping you warm and safe all season.
Key Steps for Preparing Your Heating System for Winter
A well-prepared heating system will keep your home warm, energy efficient, and safe as temperatures drop. Scheduling a professional tune-up is the #1 step to help get your heating system winter-ready and to avoid costly surprises when you need heat the most.
Replacing Dirty or Clogged Air Filters
A clogged air filter reduces airflow and makes your system work harder and less efficiently. Replacing an air filter every 1–3 months helps keep the heat running at peak performance.
Solving Thermostat Issues
Incorrect settings, low batteries, and a miscalibrated thermostat can all lead to heating problems. Adjusting the settings and changing the batteries often resolves minor issues
Clearing Vent Pathways
If you’re noticing some areas in your home are colder than others, a professional can check for obstructions and ensure proper airflow from the vents.
Tending to Pilot Light or Ignition Problems
If your pilot light doesn’t stay lit, it could be due to several issues, including a faulty sensor, a clogged pilot orifice, or even a draft blowing it out. A weak or flickering flame — especially one that appears yellow instead of blue — may indicate a gas mixture problem, which requires immediate professional attention.
Investigating Unusual Noises
If you’re hearing rattling or whistling sounds, a professional can tighten loose panels or clean out debris from ducts.
Cleaning Dusty Components
Accumulated dust on burners, sensors, or heat exchangers can reduce efficiency, but these components are typically cleaned and inspected during annual heating maintenance to keep your system running smoothly.
By getting ahead of heating system preparation, you’ll enjoy a warm, safe, and stress-free winter.
Benefits of Professional Heating Maintenance Services
Yearly professional maintenance is a smart investment that keeps your heating system running efficiently, safely, and reliably throughout the colder months. From improved air quality to enhanced safety, the heating maintenance benefits go beyond just simple fixes to keep the warm air flowing.
Benefits include:
- Increased Energy Efficiency: A technician can clean, inspect, and optimize your heating system to reduce energy consumption and lower your heating costs.
- Fewer Repairs and Breakdowns: Catching minor issues early helps prevent costly repairs and unexpected system failures.
- Extended Equipment Lifespan: Regular maintenance reduces system wear and tear, helping your system last longer and delaying replacement costs.
- Improved Indoor Air Quality: Cleaning components and replacing filters prevent dust, allergens, and pollutants from circulating in your home and the air you breathe.
- Enhanced Safety: Professionals know to check for gas leaks, carbon monoxide risks, and electrical issues to further protect your household.
- Consistent Home Comfort: A well-maintained system distributes heat evenly, eliminating cold spots and temperature fluctuations.
- Peace of Mind: Knowing your system is in top condition lets you enjoy winter without worrying about unexpected heating issues.
Professional maintenance is a smart investment that keeps your heating system running efficiently, safely, and reliably throughout the colder months.
How Annual Maintenance Saves You Money in the Long Run
While it may seem like an added expense, investing in annual heating maintenance saves you money over time. By preventing more costly repairs in the future, the added heating maintenance benefits include improving efficiency and extending your system’s lifespan, saving you money in the long run.
A well-maintained heating system runs more efficiently which in turn reduces your energy consumption and lowers your monthly utility bills, which is especially noticeable in the colder winter months.
Though they might seem like harmless issues, regular inspections can catch minor issues like worn-out parts or dirty, clogged filters, which could turn into expensive breakdowns or emergency repairs.
By keeping your heating system in peak form, annual heating maintenance ensures long-term savings and reliable comfort throughout the winter months.
When It’s Time to Upgrade Your Heating System
Heating systems are the heart of a comfortable and cozy home, but what happens when yours starts to act up? Recognizing the warning signs early can help you decide when it’s time for a new system. Here are three signs to watch for:
- Frequent repairs: If your furnace or heat pump is breaking down frequently, it may be more cost-effective to replace it rather than to keep paying for repairs. Constant service calls can add up fast, and upgrading to a new, energy-efficient system could save you money in the long run while keeping your home reliably warm.
- Age matters: Age plays a big role in deciding when to replace your heating system. Most furnaces last between 15 to 20 years, but if yours is approaching or has surpassed that mark, it may be time to start thinking about an upgrade.
- Inconsistent temperatures: You might notice certain rooms are feeling colder than others. If your furnace is struggling to keep your home consistently warm, uneven heating is often a sign that your system is losing efficiency and may need an upgrade.

Investing in Your Home’s Future with TRIO Heating, Air & Plumbing
Specializing in electric, oil, and gas furnace heating maintenance services, the team at TRIO understands the importance of keeping your furnace in tip-top condition. Using leading equipment and knowledge for the best results, we can optimize your heating system for efficiency and comfort by examining 27 critical components, from cleaning and lubricating moving parts to calibrating your thermostat.
Schedule your annual heating maintenance with TRIO Heating, Air & Plumbing today to keep safe and warm throughout the cold winter months.
